Monitor overlay
by hungryproton
200
Monitor Overlay
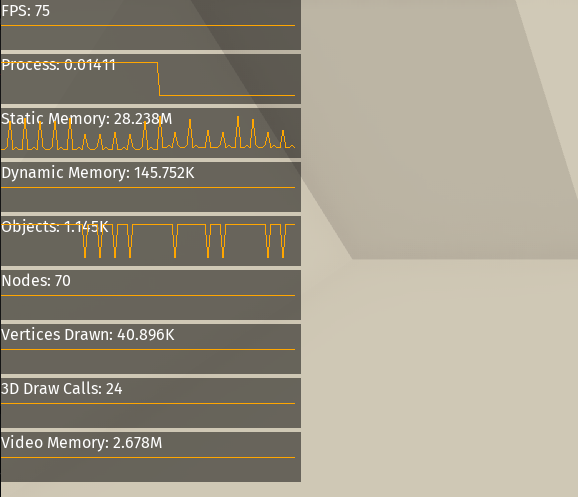
Displays data from the Monitor panel at runtime in the game window.
How to install
From the asset library
- Search for
Monitor overlayand click the install button. - Enable the addon in
Project > Project Settings > Plugins
Manually from this repository
- Clone or download the project.
- Copy the contents of the
addons/monitor_overlayfolder in your project folder as follow:

- Enable the addon in
Project > Project Settings > Plugins
How to use
- Add a new
MonitorOverlaynode to a scene.- Make sure it's the last node on the tree otherwise it may be drawn behind other objects.
- Select the node and enable turn on the monitors you need in the inspector under the
Active monitorsgroup.

Changing the position and size
- The whole overlay is a regular Control node. You have access to all the options available on UI nodes.
- Default width is 300px. This can be ajusted from the inspector under
Control > Layout > Minimum Size. - To change the vertical size of the graphs, adjust the
Graph Heightproperty in the inspector underMonitor Overlay > Options > Graph Height
Important notes
- The overlay is a control node that contains other nodes (one for each graph). Because of this, the reported amount of
objects / nodes / memory used / primitives drawn (and potentially others too) will differ if the overlay is enabled or not.
Although the difference is not significant, keep in mind it exists. - Plotting a graph requires to keep track of the values history and can impact performance.
- If you don't need this feature, you can turn it off by disabling the
Plot Graphsoption in the inspector. - Lowering the
Historyparameter also helps.
- If you don't need this feature, you can turn it off by disabling the
Licence
MIT
Download
Version1.1.0
Download Now
Support
If you need help or have questions about this plugin, please contact the author.
Contact Author